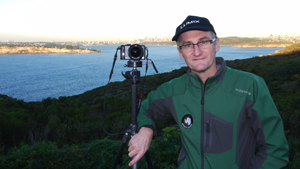
Peter Eastway has a professional photography career spanning nearly 30 years. He has achieved the status of AIPP Grand Master of Photographer, one of only eight in the world, and is most passionate about landscapes and portraiture.
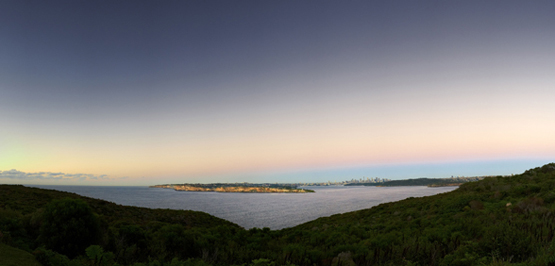
As part of Lumix Life: Focus on Australia project Peter took the LUMIX GF1 to Sydney’s North Head to create a beautiful panoramic shot capturing the iconic headland at sunrise. To help capture the immense scale of the outlook Peter decided to employ stitching, the following is his own account of the process to go through for successfully creating a panoramic stitch.
 Sunrise, South Head from North Heady, Sydney. Shot with a LUMIX GF1 by Peter Eastway
How to achieve this panoramic stitch
The trick to stitching panoramas is right at the beginning when you take the photograph. All stitching software does its best to match one photograph to the next for a seamless result, but it can’t do it if you have different exposures and different focus settings. This is where using a camera like the Lumix GF1 comes in handy because you can set everything manually if you wish. I also used a tripod to ensure my stitches were accurate. Here’s what I did.
I set the camera up on the tripod and leveled it as best I could. I checked the horizon staying in the middle of the frame by swinging the camera around through the scene I was about to photograph. A slight difference is fine as the software will handle it.
Next, I switched the camera to manual focus and focused the lens manually, using the enlarged view on the Lumix’s LCD screen. Focusing on infinity for a shot like this is pretty straightforward. Next, is set the camera exposure mode to manual and set the aperture and shutter speed manually, using the histogram to ensure my exposure was accurate. When working out the exposure, however, I pointed the camera towards the brightest part of the scene (the left) and ensured the highlights were correctly exposed. It’s very hard to correct overexposed highlights.
If I were shooting JPEGs, I’d also set the white balance to a manual setting, such as daylight. I wouldn’t leave it on Auto because the white balance might change from shot to shot and, as explained, it’s best to keep every photo in the stitch series as similar as possible. If you are shooting raw files, then it’s not so important because you can set the colour balance when you process the raw files.
To take the photographs, I overlapped each frame by 30 to 50 percent. The wider the lens, the more I overlap each frame as this makes the stitching process more accurate.
To put the photos together, I just opened the files in Photoshop, but Photoshop Elements will just as good a job. As raw files, they open up in Adobe Camera Raw, I set the colour, contrast and exposure for one image and copy the settings to all the frames, and then let Photoshop go to work. The stitch was perfect.
To complete this image, I darkened down the sky and added a little colour saturation to the rock cliffs on South Head, but really this was such a beautiful morning, the resulting image is exactly what I remember.
Now it’s your turn!
To see more of Peter Eastway’s photos for Lumix Life visit his online gallery.

